Homebuilt: DIY Chuck Box
Well, here we go. I’ve been thinking of documenting my little DIY projects for a while now, and this seemed like a perfect first candidate for my Homebuilt blog series.
I first discovered this handy item scrolling through Pinterest a couple weeks ago. As soon as I saw it, I thought, “Why do we not already have one of these?!” One of the most ANNOYING things for me while out car camping is our lack of kitchen storage. While my truck bed drawers worked well in keeping everything together, it was a bit inconvenient at certain times. Especially that crucial time in the mornings when one of us is up at sunrise and trying to make coffee without waking the other. Just pulling out the percolator involved trying to “silently” open the tailgate, pull out the drawer, pull out the percolator, and put it all back. Needless to say, it was anything but silent.

My initial ambitious and simplified sketch and parts list.
With the recent sale of our old canopy, it seemed a perfect time to reimagine our setup. First up: the Chuck Box. I started with a quick sketch during some free time at work, inspired by various other iterations I had seen on Pinterest. With basic ideas and a tape measure, I imagined the dimensions and all the hardware needed. I thought it was a pretty good place to start. Not to mention a pretty good project to get me outside after work for a couple of these dark winter nights.
Night one began by picking up the hardware I thought I needed, and going through the scrap wood side of my garage. What I’ll refer to now as the “blunderyard.” I disassembled an attempt at a skate box I made from a metal frame I found on the side of the road, and a pretty poor attempt at a kicker. The rest was all leftovers from other projects, including 3/8” plywood, 1/2”, and 3/4”. A true Frankenstein’s monster of a chuck box. Pro Tip #1: Use the same thickness of plywood for the entire project. It makes measurements and cuts so much simpler. But if you’re cheap like me, use what you’ve got and measure thrice, cut once. The first night of work ended with my basic box worked out. I did the bottom, top, and three sides, along with a vertical partition and top shelf. For the lid, I used two hinges and a lid spring assist to hold it at whatever position I chose.

Basic box over here.
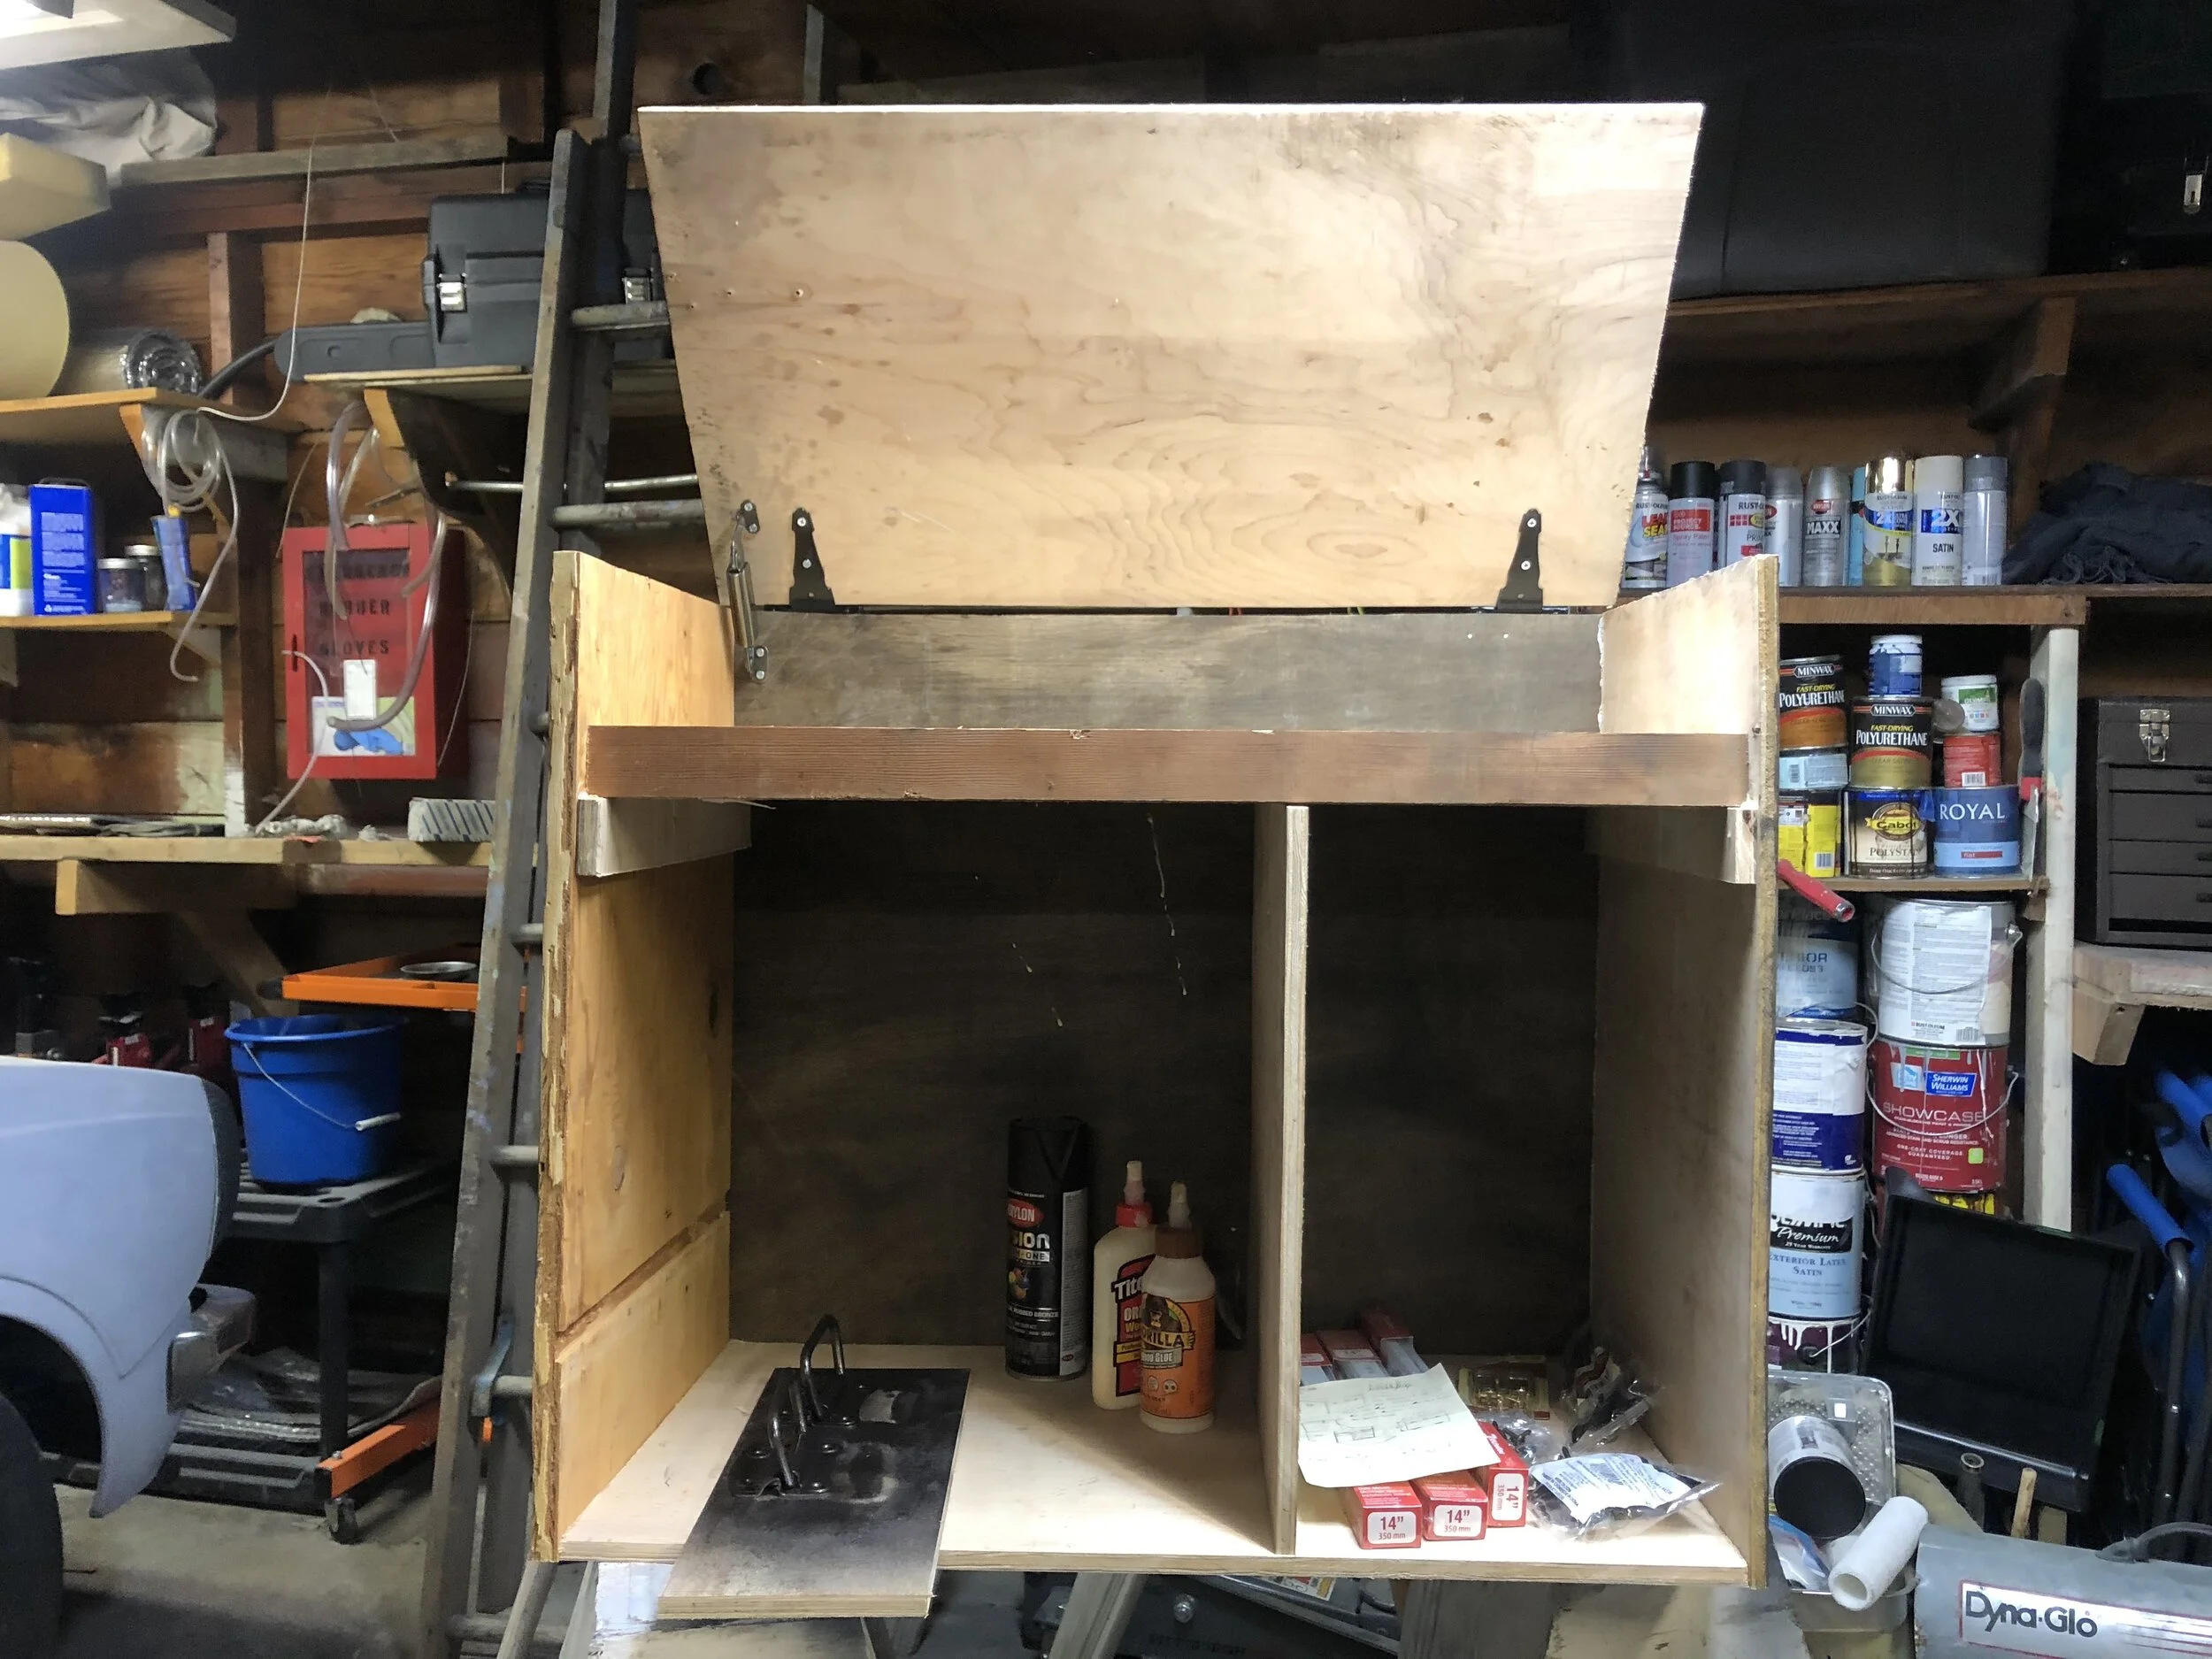
Starting to take shape. Painting handles with oil-rubbed bronze spray paint to match a little better.
Night two was a little bit less labor-intensive, and focused more on finishing the exterior and adding hardware. I added a fold-out front worktop with chain support, fit a front piece to the lid, added latches, handles, and rolling casters for portability.


Looks like a classic trunk at this point. Also tried a little bit of wood burning. Pro Tip #2: different types of plywood have VASTLY different burn effects. *Before the chop.
Sometime during night two, I decided my initial dimensions were way too big. I realized that not only did I not need that much space for all my camp kitchen gear, but this thing was too tall to handle. Heavy enough for two people and majorly cumbersome for one. At least one that’s 5’7” or under. So here we are after three hours on day three and all I’ve done is take it apart, chop it down about 5” and put it back together. What an annoying day. One step forward, two steps back.

*After the chop. More manageable size and weight, and not a bad bench height either.
Now we’re on day four, and the last day of this build. This night was dedicated entirely to drawer fabrication and fold-down door work. I took out the chains after realizing they would be in the way of the sliding drawers. I replaced them with another lid spring assist to hold everything where I want it. The easy part was for the right side and having all the drawers the same dimensions. Repeatability makes for an easier time of things. The wider drawer wasn’t really any harder, just required more material. The difficult part was fitting the drawer slides in the cramped spots. It made me wish for a third hand to hold the thing while my other two drilled in the screw. Pro Tip #3: Use wood clamps for your third hand in the hard-to-reach spaces. After the drawers were all put in and sliding well, I added a few little led button-lights to light up the drawers and working spaces for when it’s dark and we need to see what we’re doing. And there we had it, the chuck box was done.

Lit up for night time handling with the button lights (6-pack for $10 at Lowe’s).
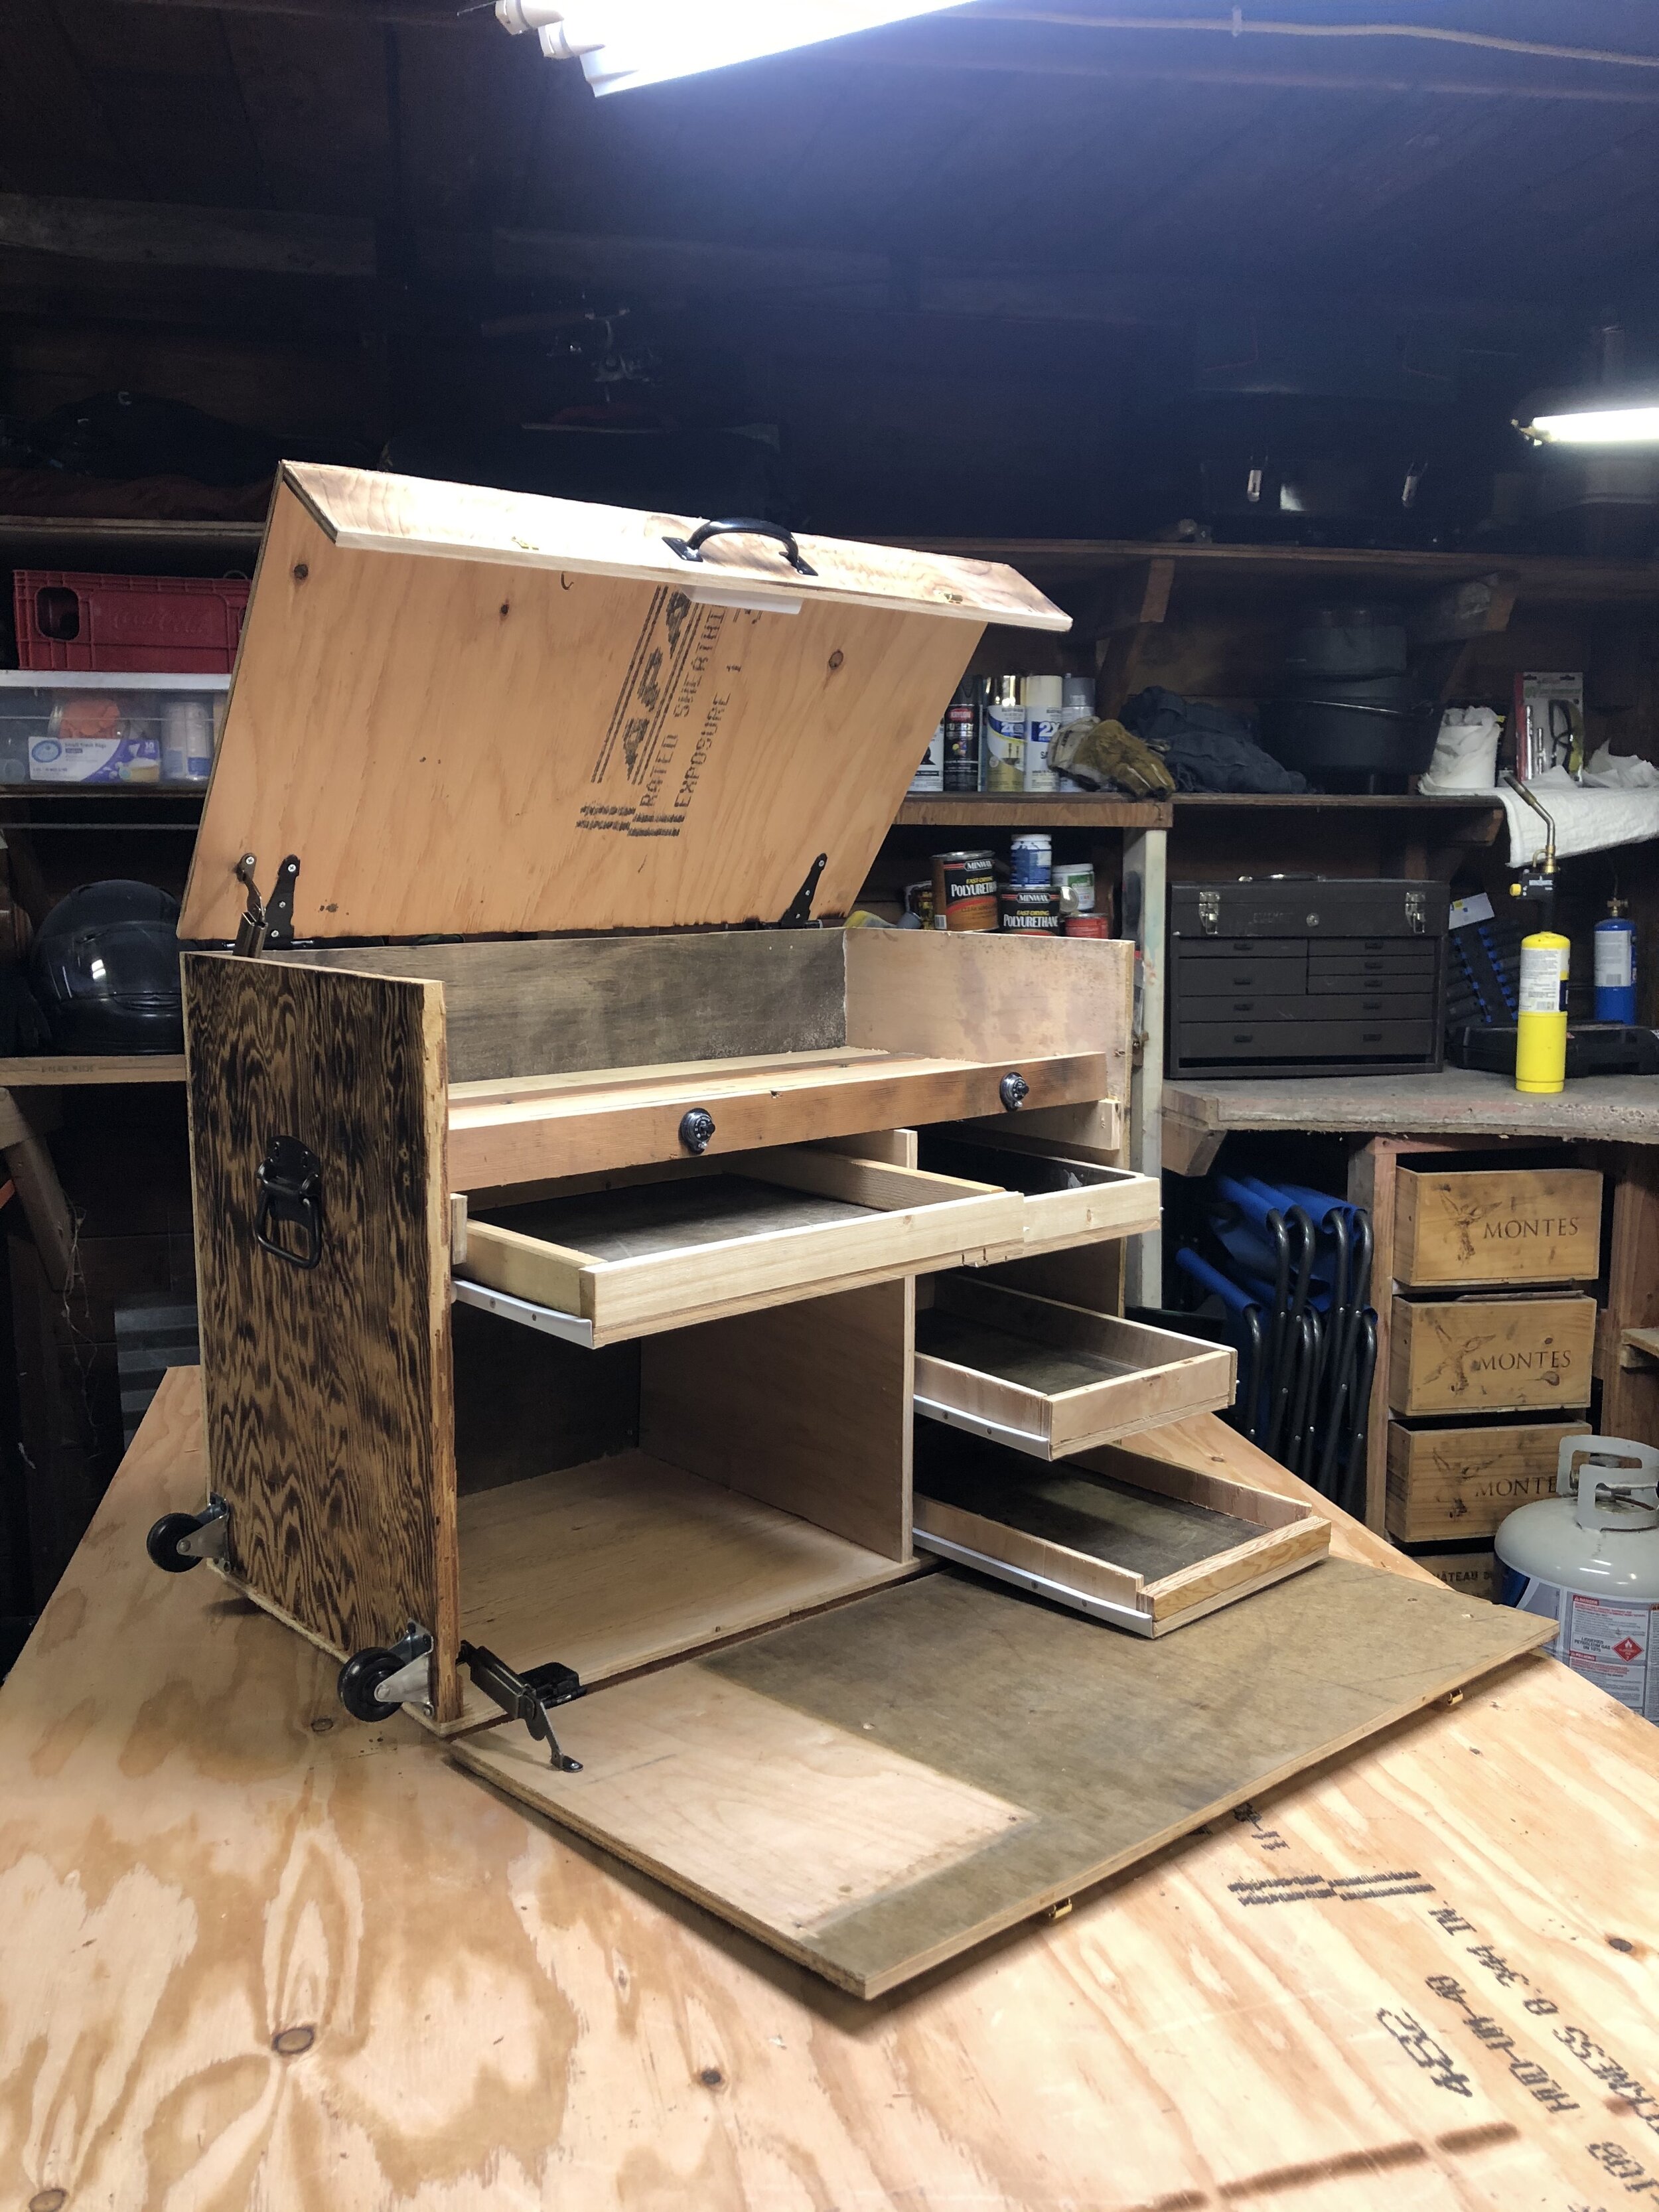
All assembled and ready to go!
Being the neurotic person I am, I’ll be totally honest and say this thing is NOT done. I still need to paint all the hardware to match. I still need to sand and paint or stain the box because I’m not content with the wood burning experiment. I still need to actually USE this thing and test it out! Bottom line: I’m super excited to start using my new camp kitchen chuck box and really dial it in. Who knows, maybe I’ll hate it and build a totally new one and sell this one off. Maybe I’ll love it and wonder why I hadn’t built one sooner. Either way, I’m sure I’ll post a follow-up and do a review on my likes and dislikes regarding the chuck box in the future. With that, take it easy and go create something!